
To back up a VMware environment with Oxibox, you need to deploy an Oxibox virtual machine in your infrastructure. This VM contains the agent and an interface to configure your backups. The agent can send the backups to the Oxibox cloud or to an Oxibox appliance.
A dedicated user on your vSphere is used by the agent to talk to the VMware API, take snapshots of the VMs to back up and download the virtual disks concerned.
Prerequisites
You must have vCenter 6.5 or later in your VMware infrastructure. Also follow the flow matrix provided by Oxibox support to open the network permissions the backup needs to work. In particular, you must allow access to port 443 on your vSphere and on the ESXi hypervisors that host the VMs to back up.
We recommend creating a user dedicated to backup on vSphere. This user is used by the Oxibox backup agent to carry out the operations needed to back up your virtual machines.
Creating a role
Log in to the vSphere interface with an administrator account. In the main menu, click “Administration”.
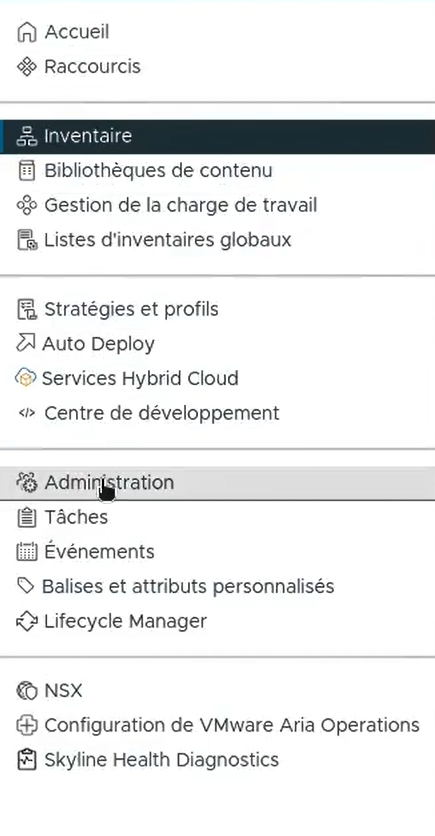
Then click “Rôles” (Roles). Make sure you have selected the right role provider, then click “Nouveau” (New).
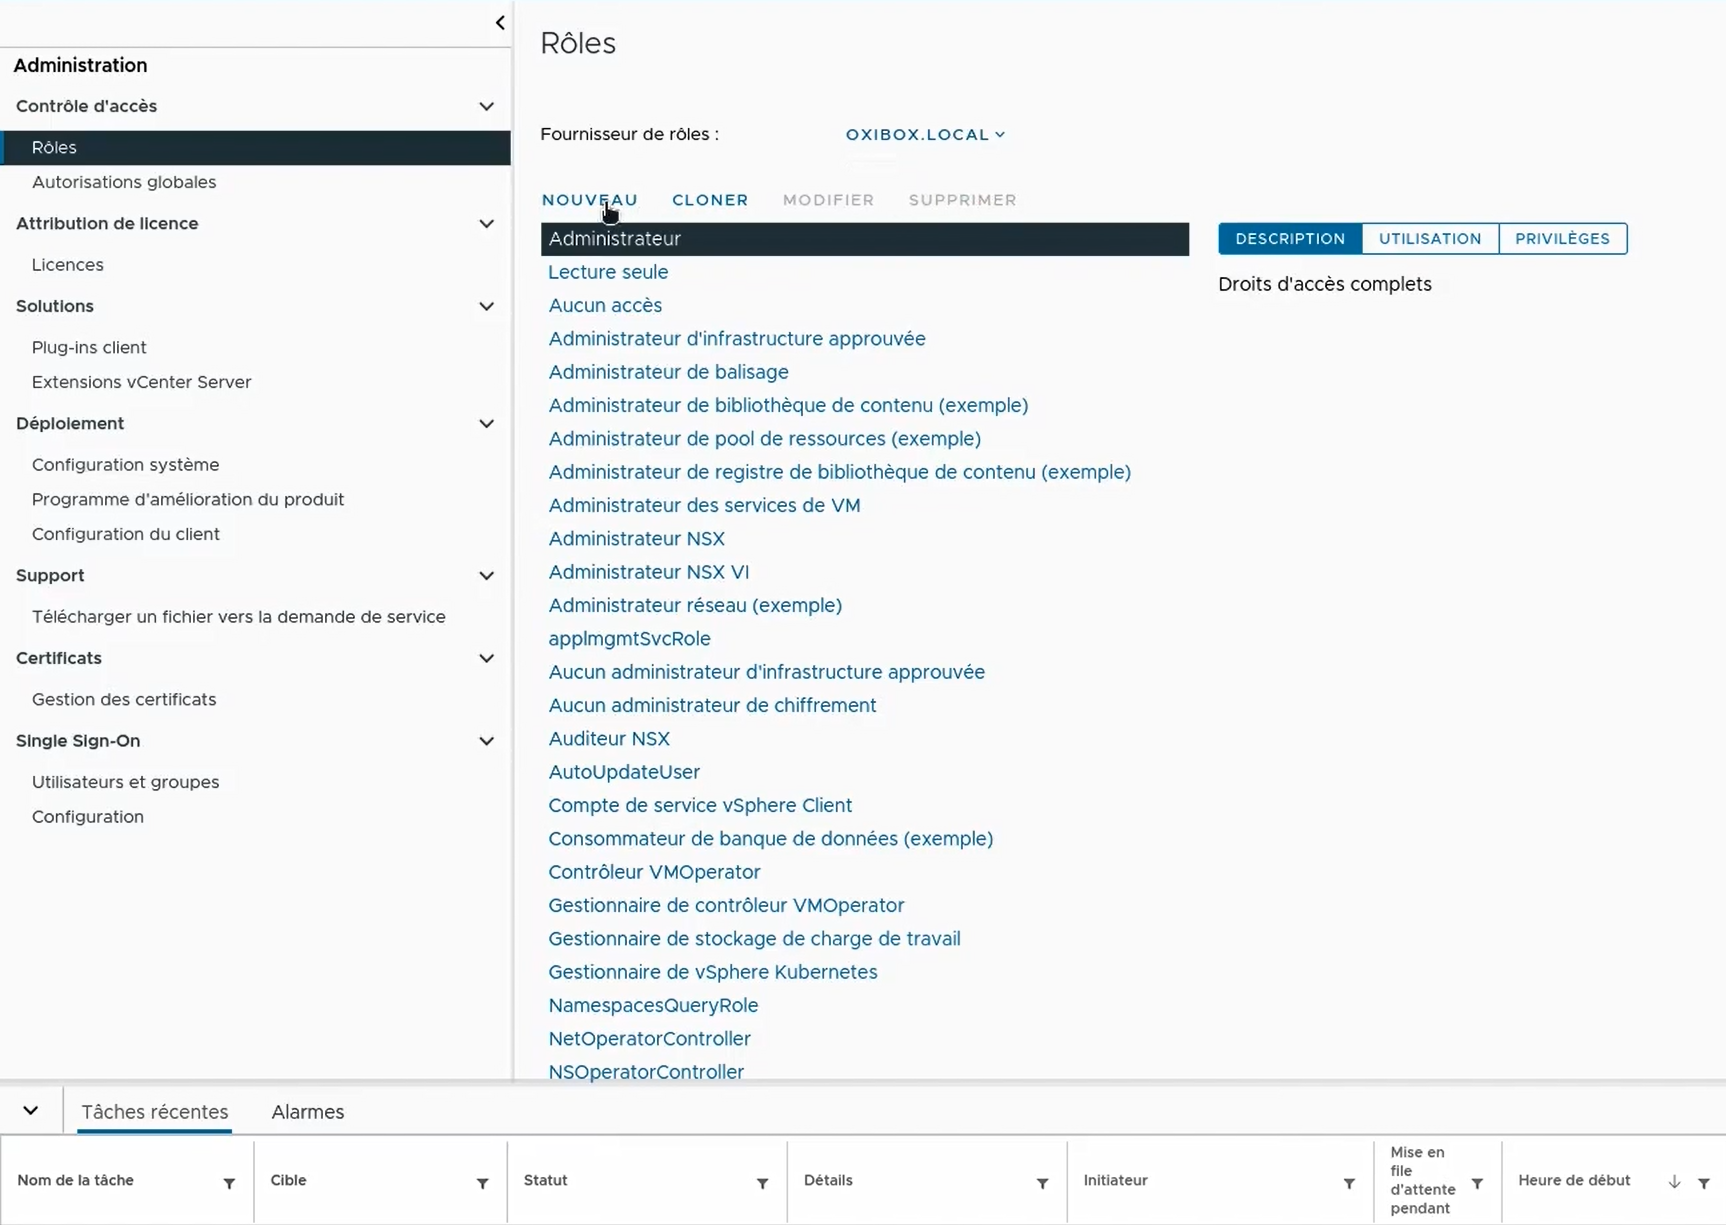
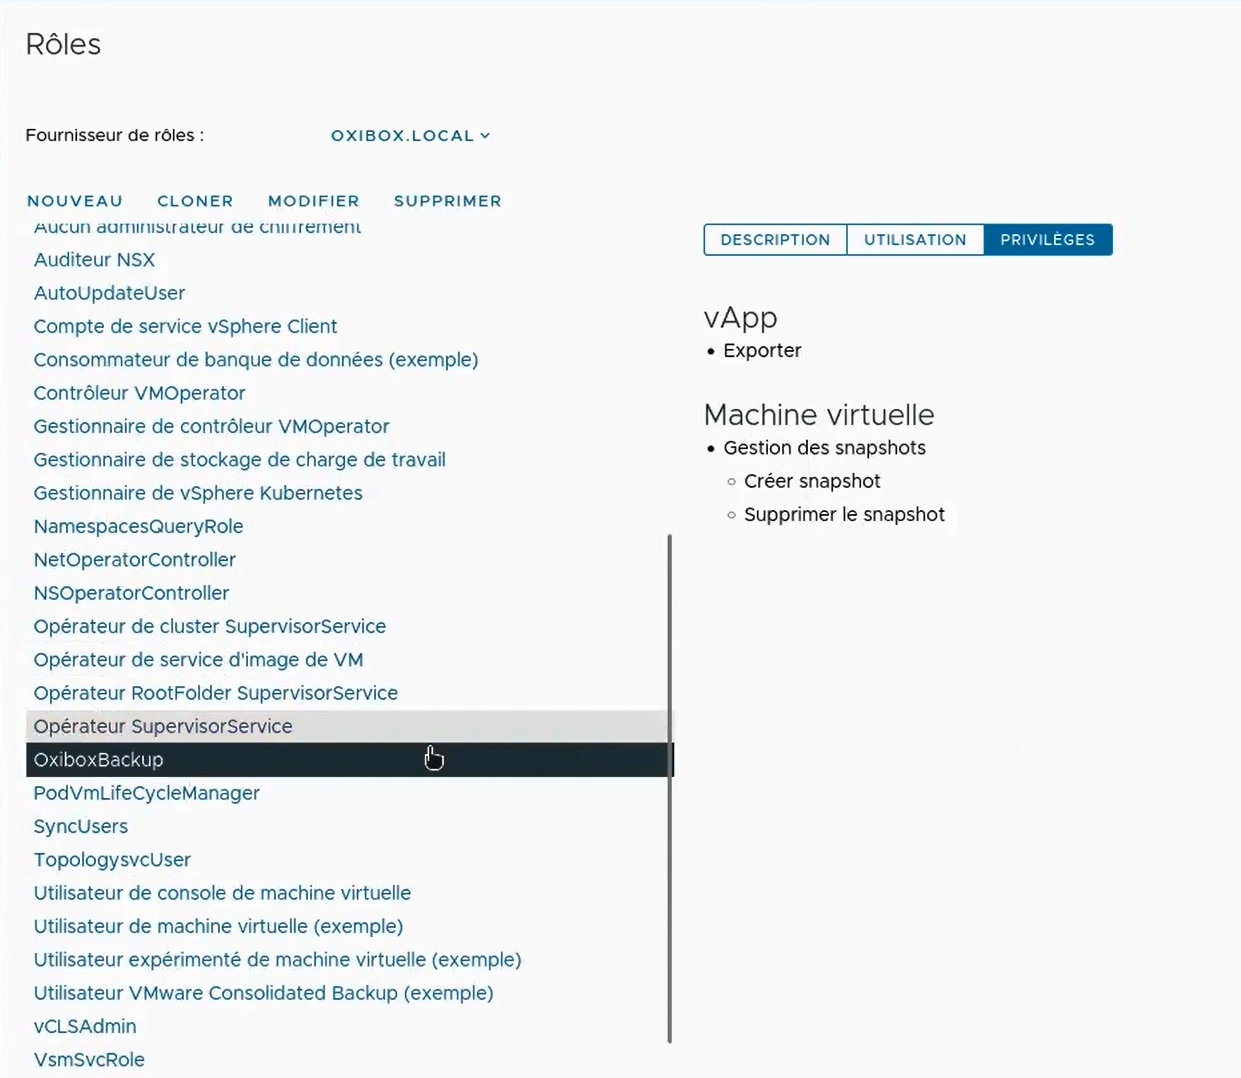
Create a role, named for example “OxiboxBackup”, and assign the following permissions:
- vApp
- Exporter (Export)
- Machine virtuelle (Virtual machine)
- Gestion des snapshots (Snapshot management)
- Créer snapshot (Create snapshot)
- Supprimer le snapshot (Delete snapshot)
- Gestion des snapshots (Snapshot management)
Creating a user
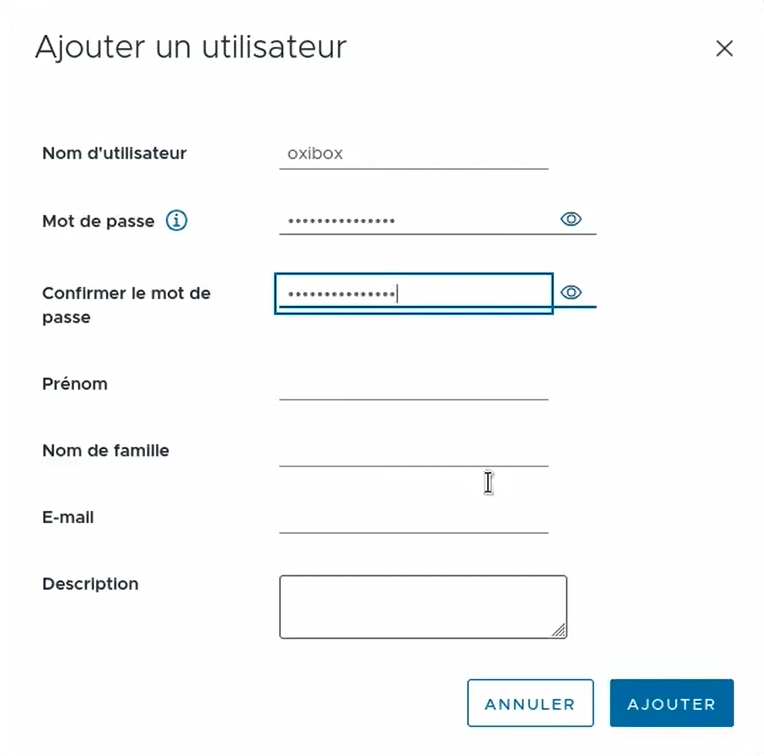
You now need to create a new user. In the “Administration” menu, click “Utilisateurs et groupes” (Users and Groups) under the “Single Sign-On” category.
Make sure you are in the right domain, then click “Ajouter” (Add). Enter a username and a password, and remember them because you will need them later. In this example we name the user oxibox.
Applying the permissions
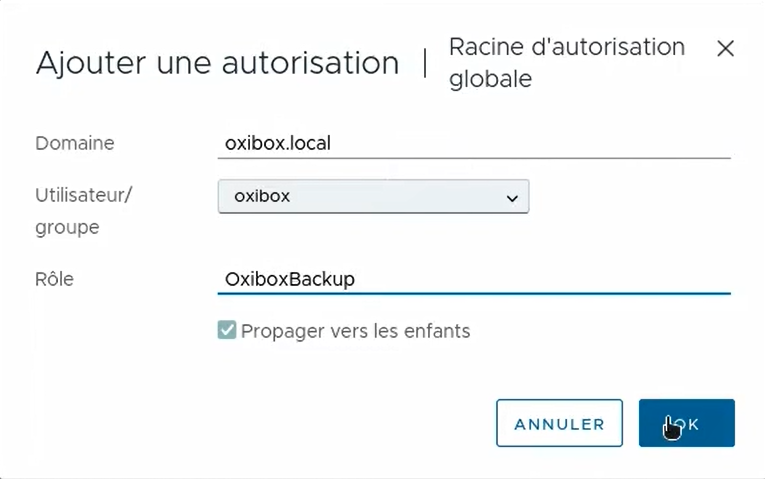
We now add a permission so that the user you created has the OxiboxBackup role on your infrastructure. In the “Administration” menu, click “Autorisations globales” (Global Permissions) under the “Contrôle d’accès” (Access Control) category.
Make sure you are on the right permission provider, then click “Ajouter” (Add).
In the window that opens, make sure you are in the right domain, then:
- Select the user that was created (here
oxibox). - Assign the role created earlier (here OxiboxBackup).
- Tick “Propager vers les enfants” (Propagate to children) to propagate this role for this user across your whole VMware infrastructure. If the user must have more limited visibility, you must instead go to the Permissions tab of the various Datacenters and hypervisors in your infrastructure to add this role and this user. Without this, the Oxibox backup agent cannot back up your virtual machines.
Installation and configuration
Installing the Oxibox VM
Download the OVA file of the Oxibox VM by clicking here. This virtual machine hosts the backup agent and a web interface that lets you configure your backups. The backups can be sent to the Oxibox cloud or to an appliance.
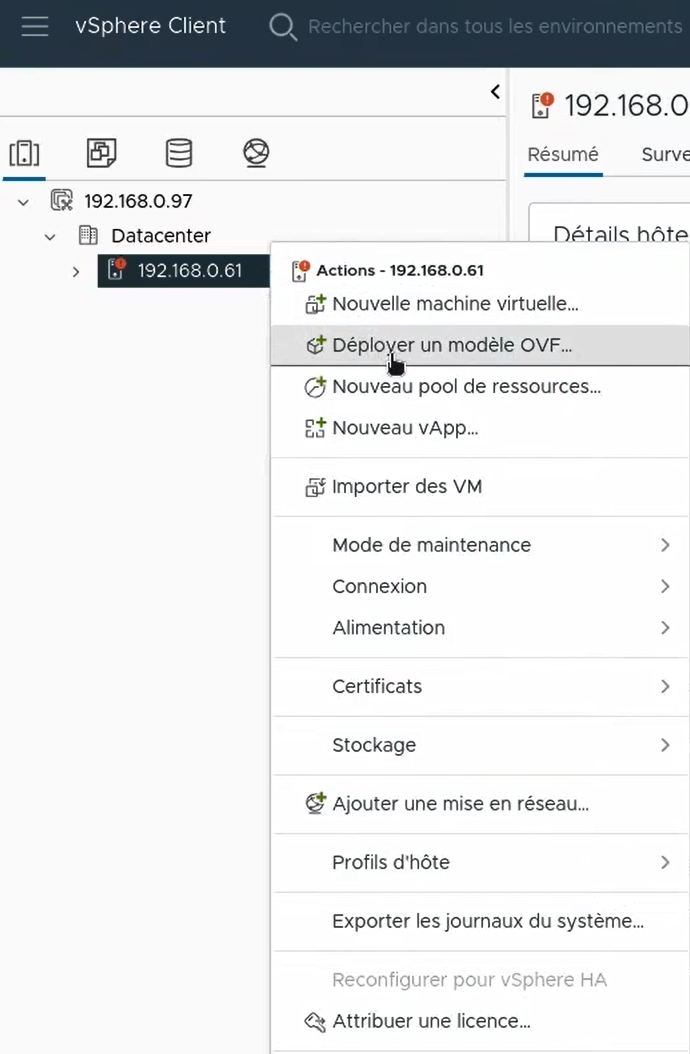
To deploy the Oxibox VM, right-click your Datacenter in your VMware inventory, then click “Déployer un modèle OVF” (Deploy OVF Template).
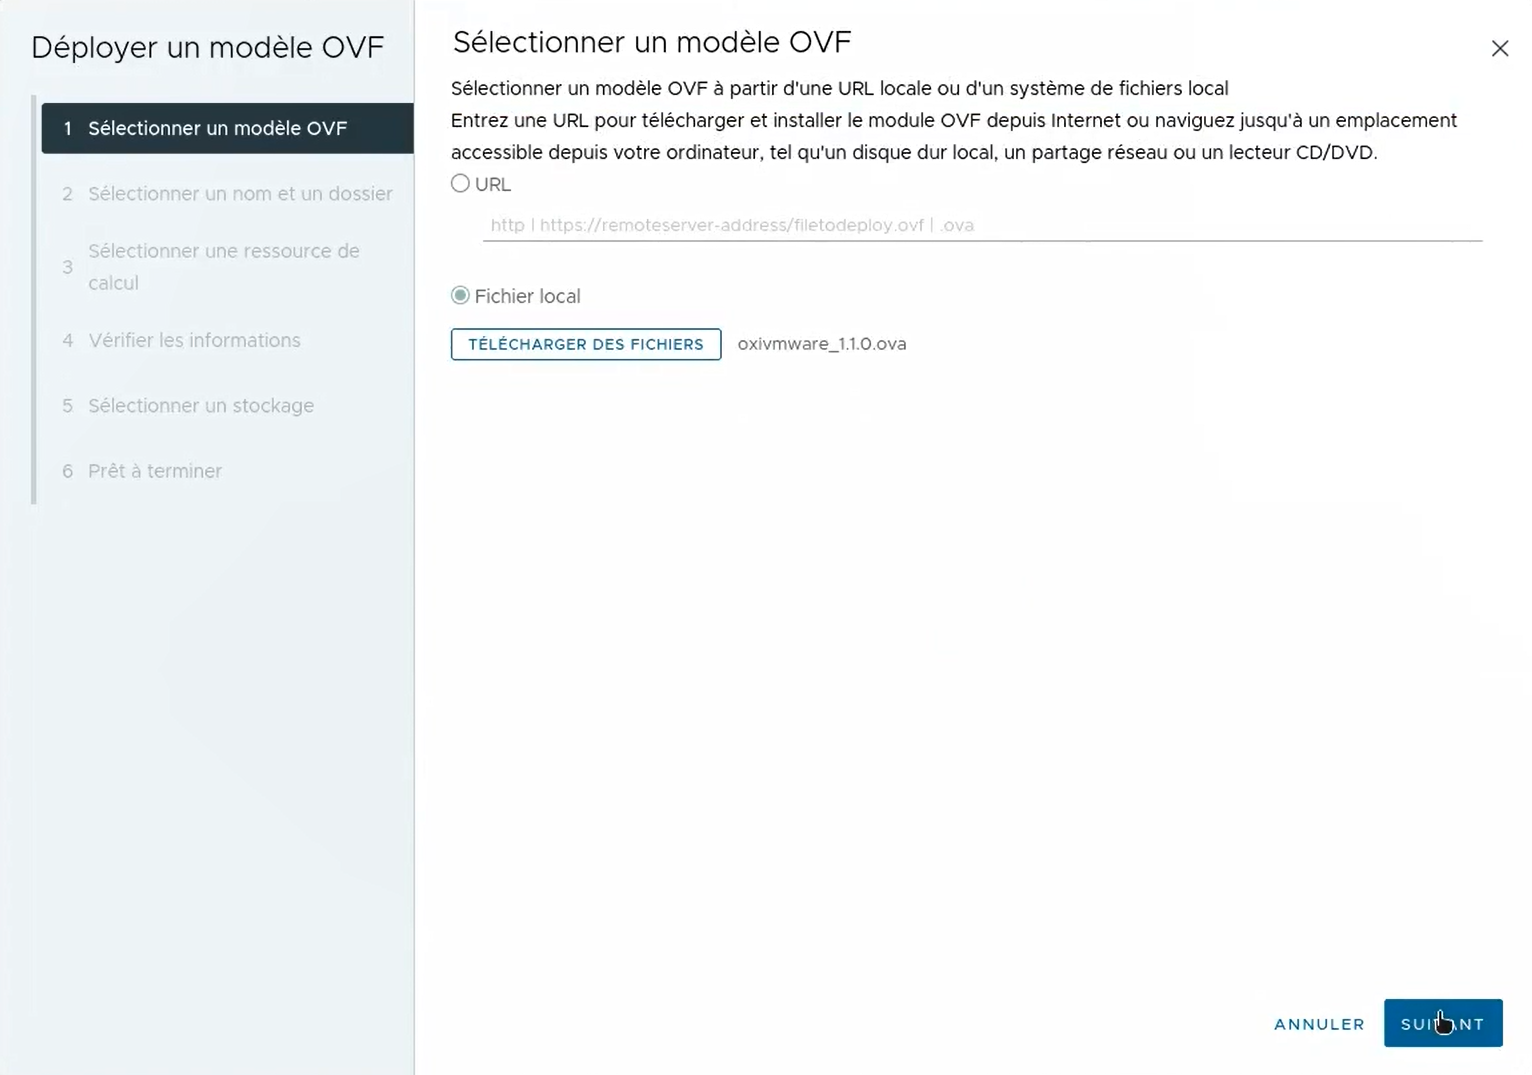
In the window that opens, select “Fichier local” (Local file), then click “Télécharger des fichiers” (Upload files) to select the OVA file you downloaded earlier, then click Next (“Suivant”).
Follow the steps up to step 5, choosing a name and a hypervisor on which to deploy the VM.
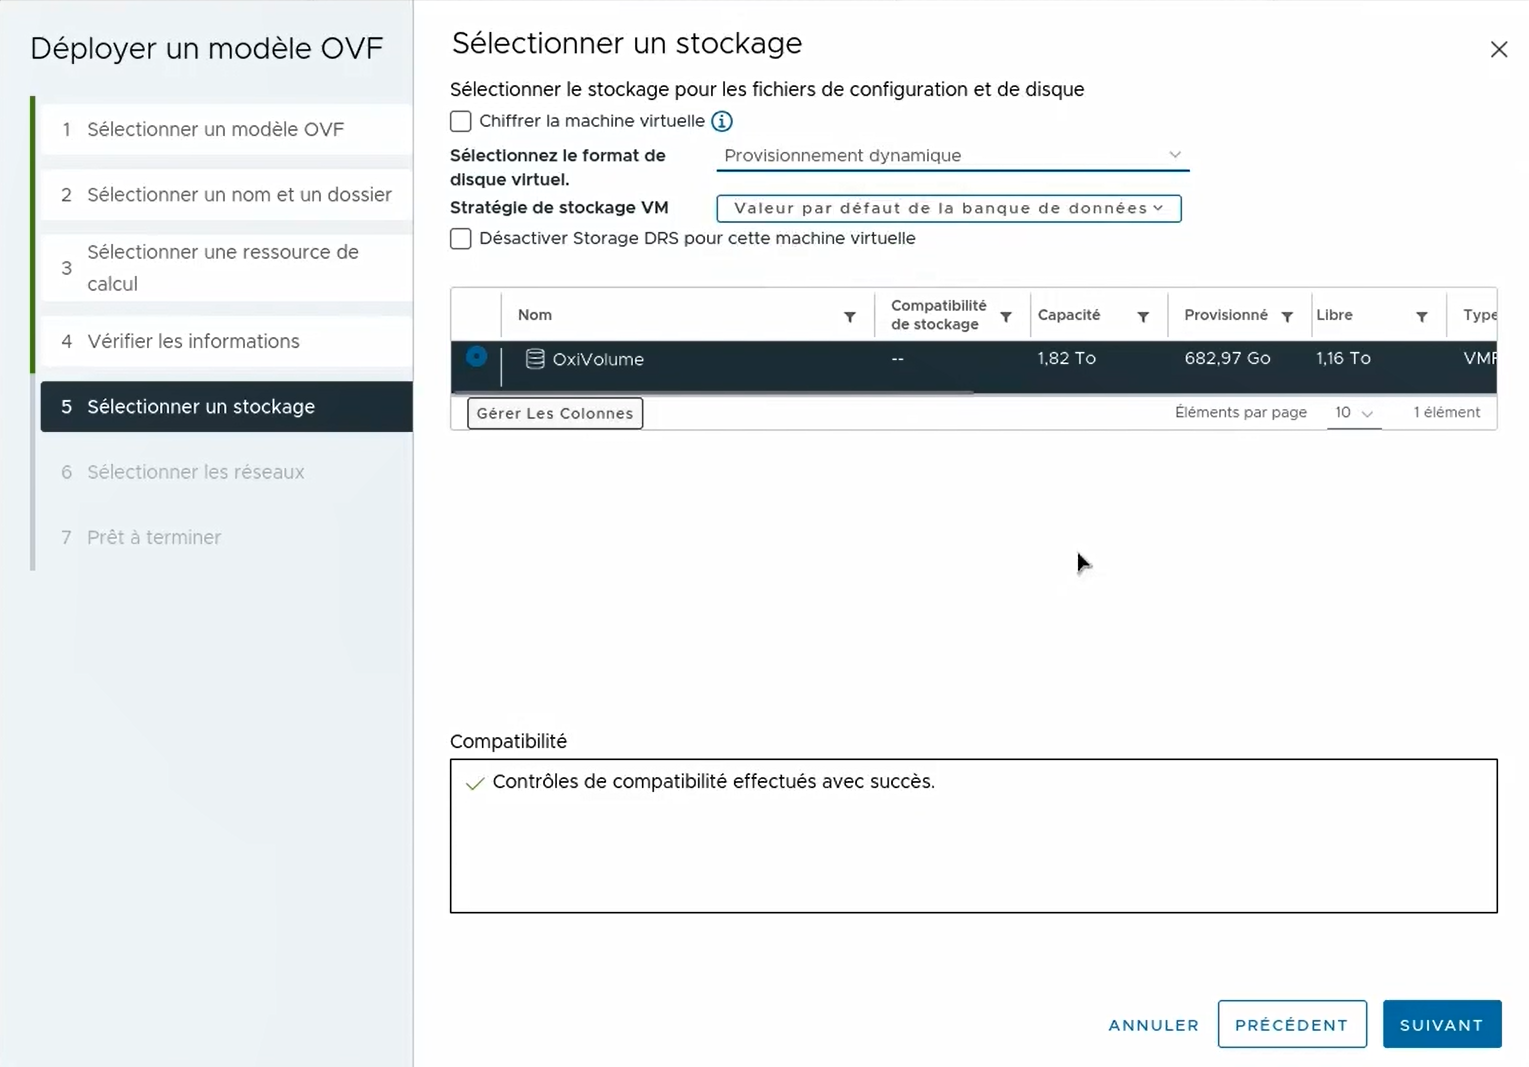
At step 5, select the storage where the VM's virtual disk will be stored. The Oxibox VM contains only the system, the Oxibox agent and a cache for the backups. The backups themselves are not stored on this VM and are transferred directly to the destination of your choice (appliance or cloud). Select “Provisionnement dynamique” (Thin provisioning) as the virtual disk format. This saves disk space on your infrastructure with no impact on backup performance. Click Next.
Select the network or networks the VM must be connected to, then click Next. You can check the information and then click Finish.
The VM is then imported. It should appear in your vSphere inventory once everything has completed successfully. You can then select the VM and start it.
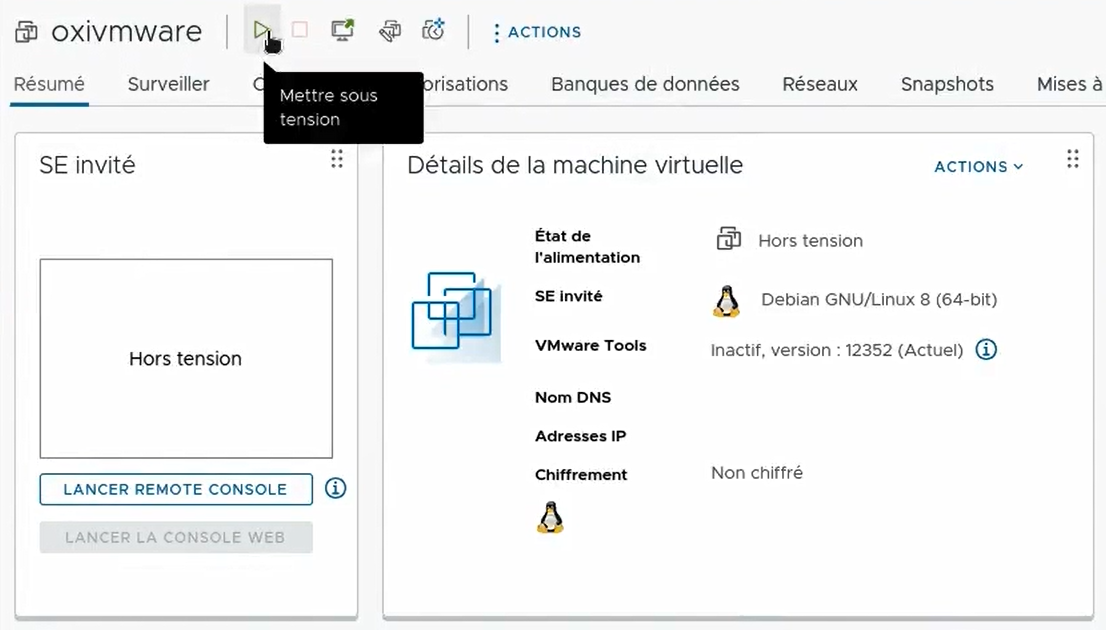
Advanced system settings
This step is optional but may be necessary in some installations.
By default, the Oxibox VM is configured for DHCP. If your network cannot provide an address through DHCP, if your DHCP cannot offer a static IP, or if custom DNS or NTP servers are needed, you must go through the system configuration before continuing. If you do not need such settings, go on to backup configuration.
Once the Oxibox VM has started, you can open a console through the vSphere interface.
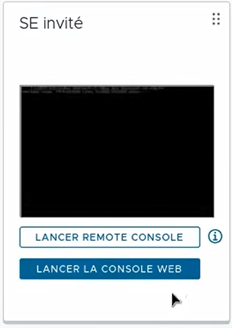
Use the following credentials depending on your case:
- Onboarding not yet done in the web interface:
- Username:
oxivmware - Password:
oxibox
- Username:
- Onboarding done in the web interface:
- Username:
oxivmware - The password is the same as that of the local account used to log in to the VMware backup management web interface.
- Username:
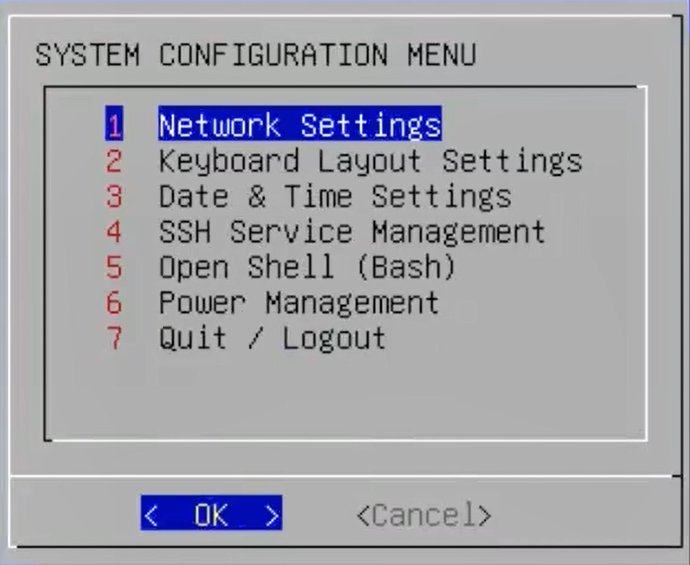
The menu offers several features:
- Network management (interfaces, DHCP/static, IPv4/v6, DNS, MTU)
- Keyboard layout management
- Date and time management (time zone, NTP)
- Enable/disable SSH
- Access to a shell
- Shut down or restart the VM
Follow the instructions in the menus to configure whatever your deployment needs.
Backup configuration
Once the VM has fully started, open a web browser and go to https://IP_VM_OXIBOX. You can find the IP in the vSphere interface, in the virtual machine's Details, or by opening a console on the VM.
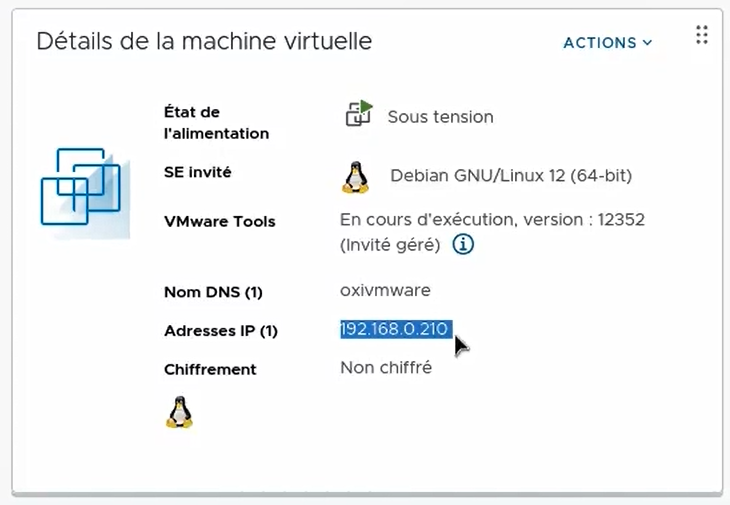
You need to ignore the certificate warning shown by your browser. The first time you open the interface, you must go through the onboarding phase to create an account that you will use to access the backup management web interface, and to enter the credentials of the Oxibox account to use.
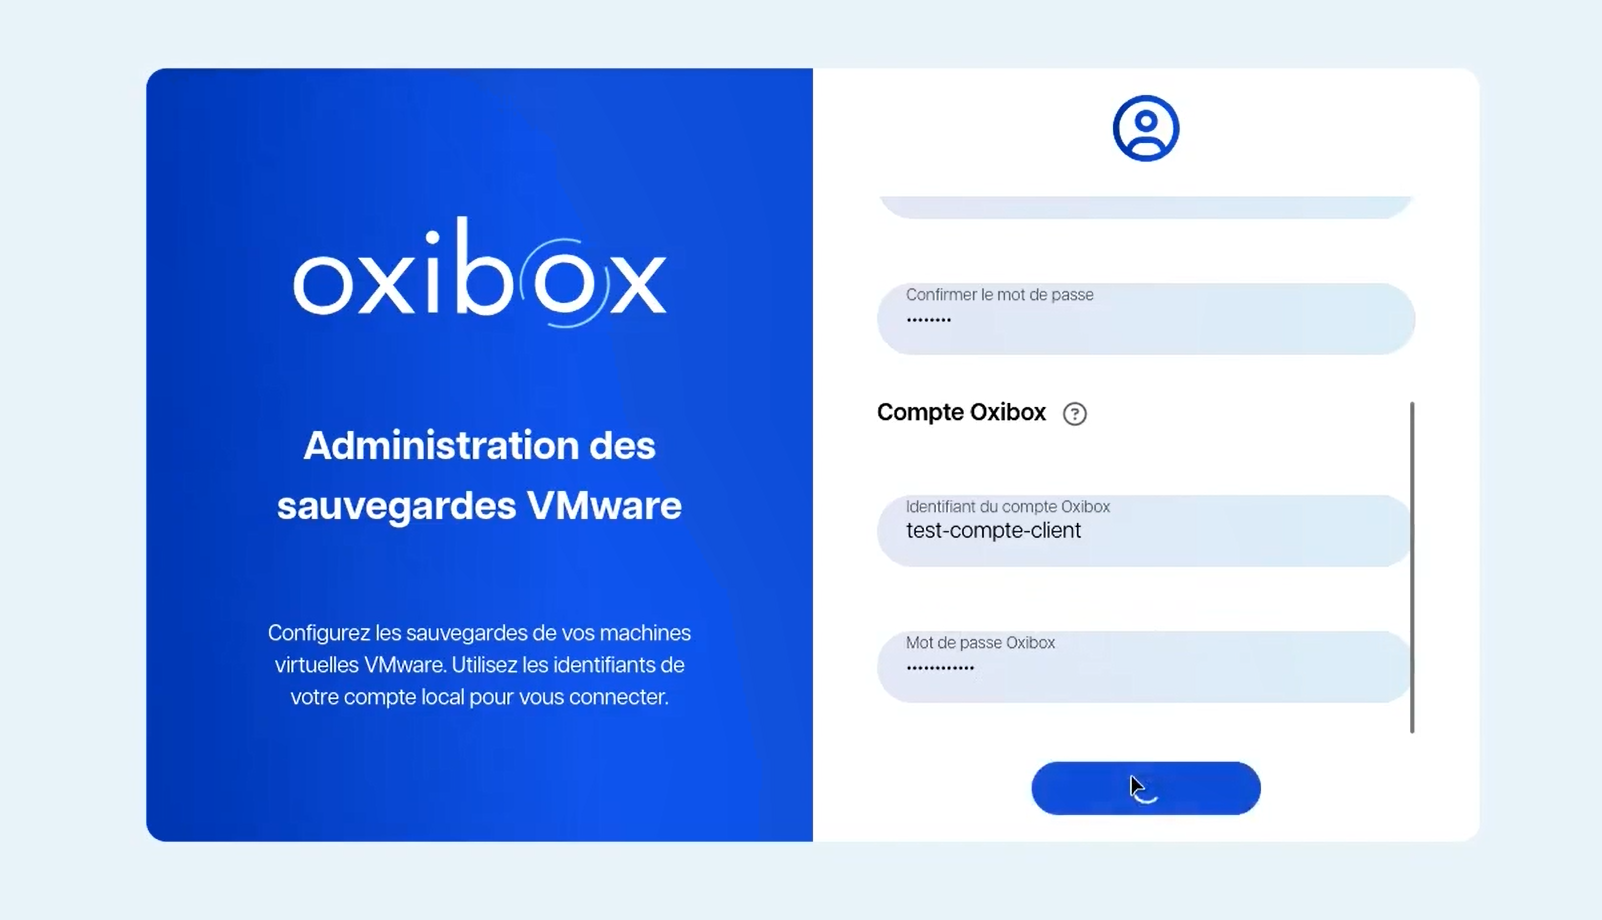
Confirm the creation, then log in with the credentials of the local account you have just created.
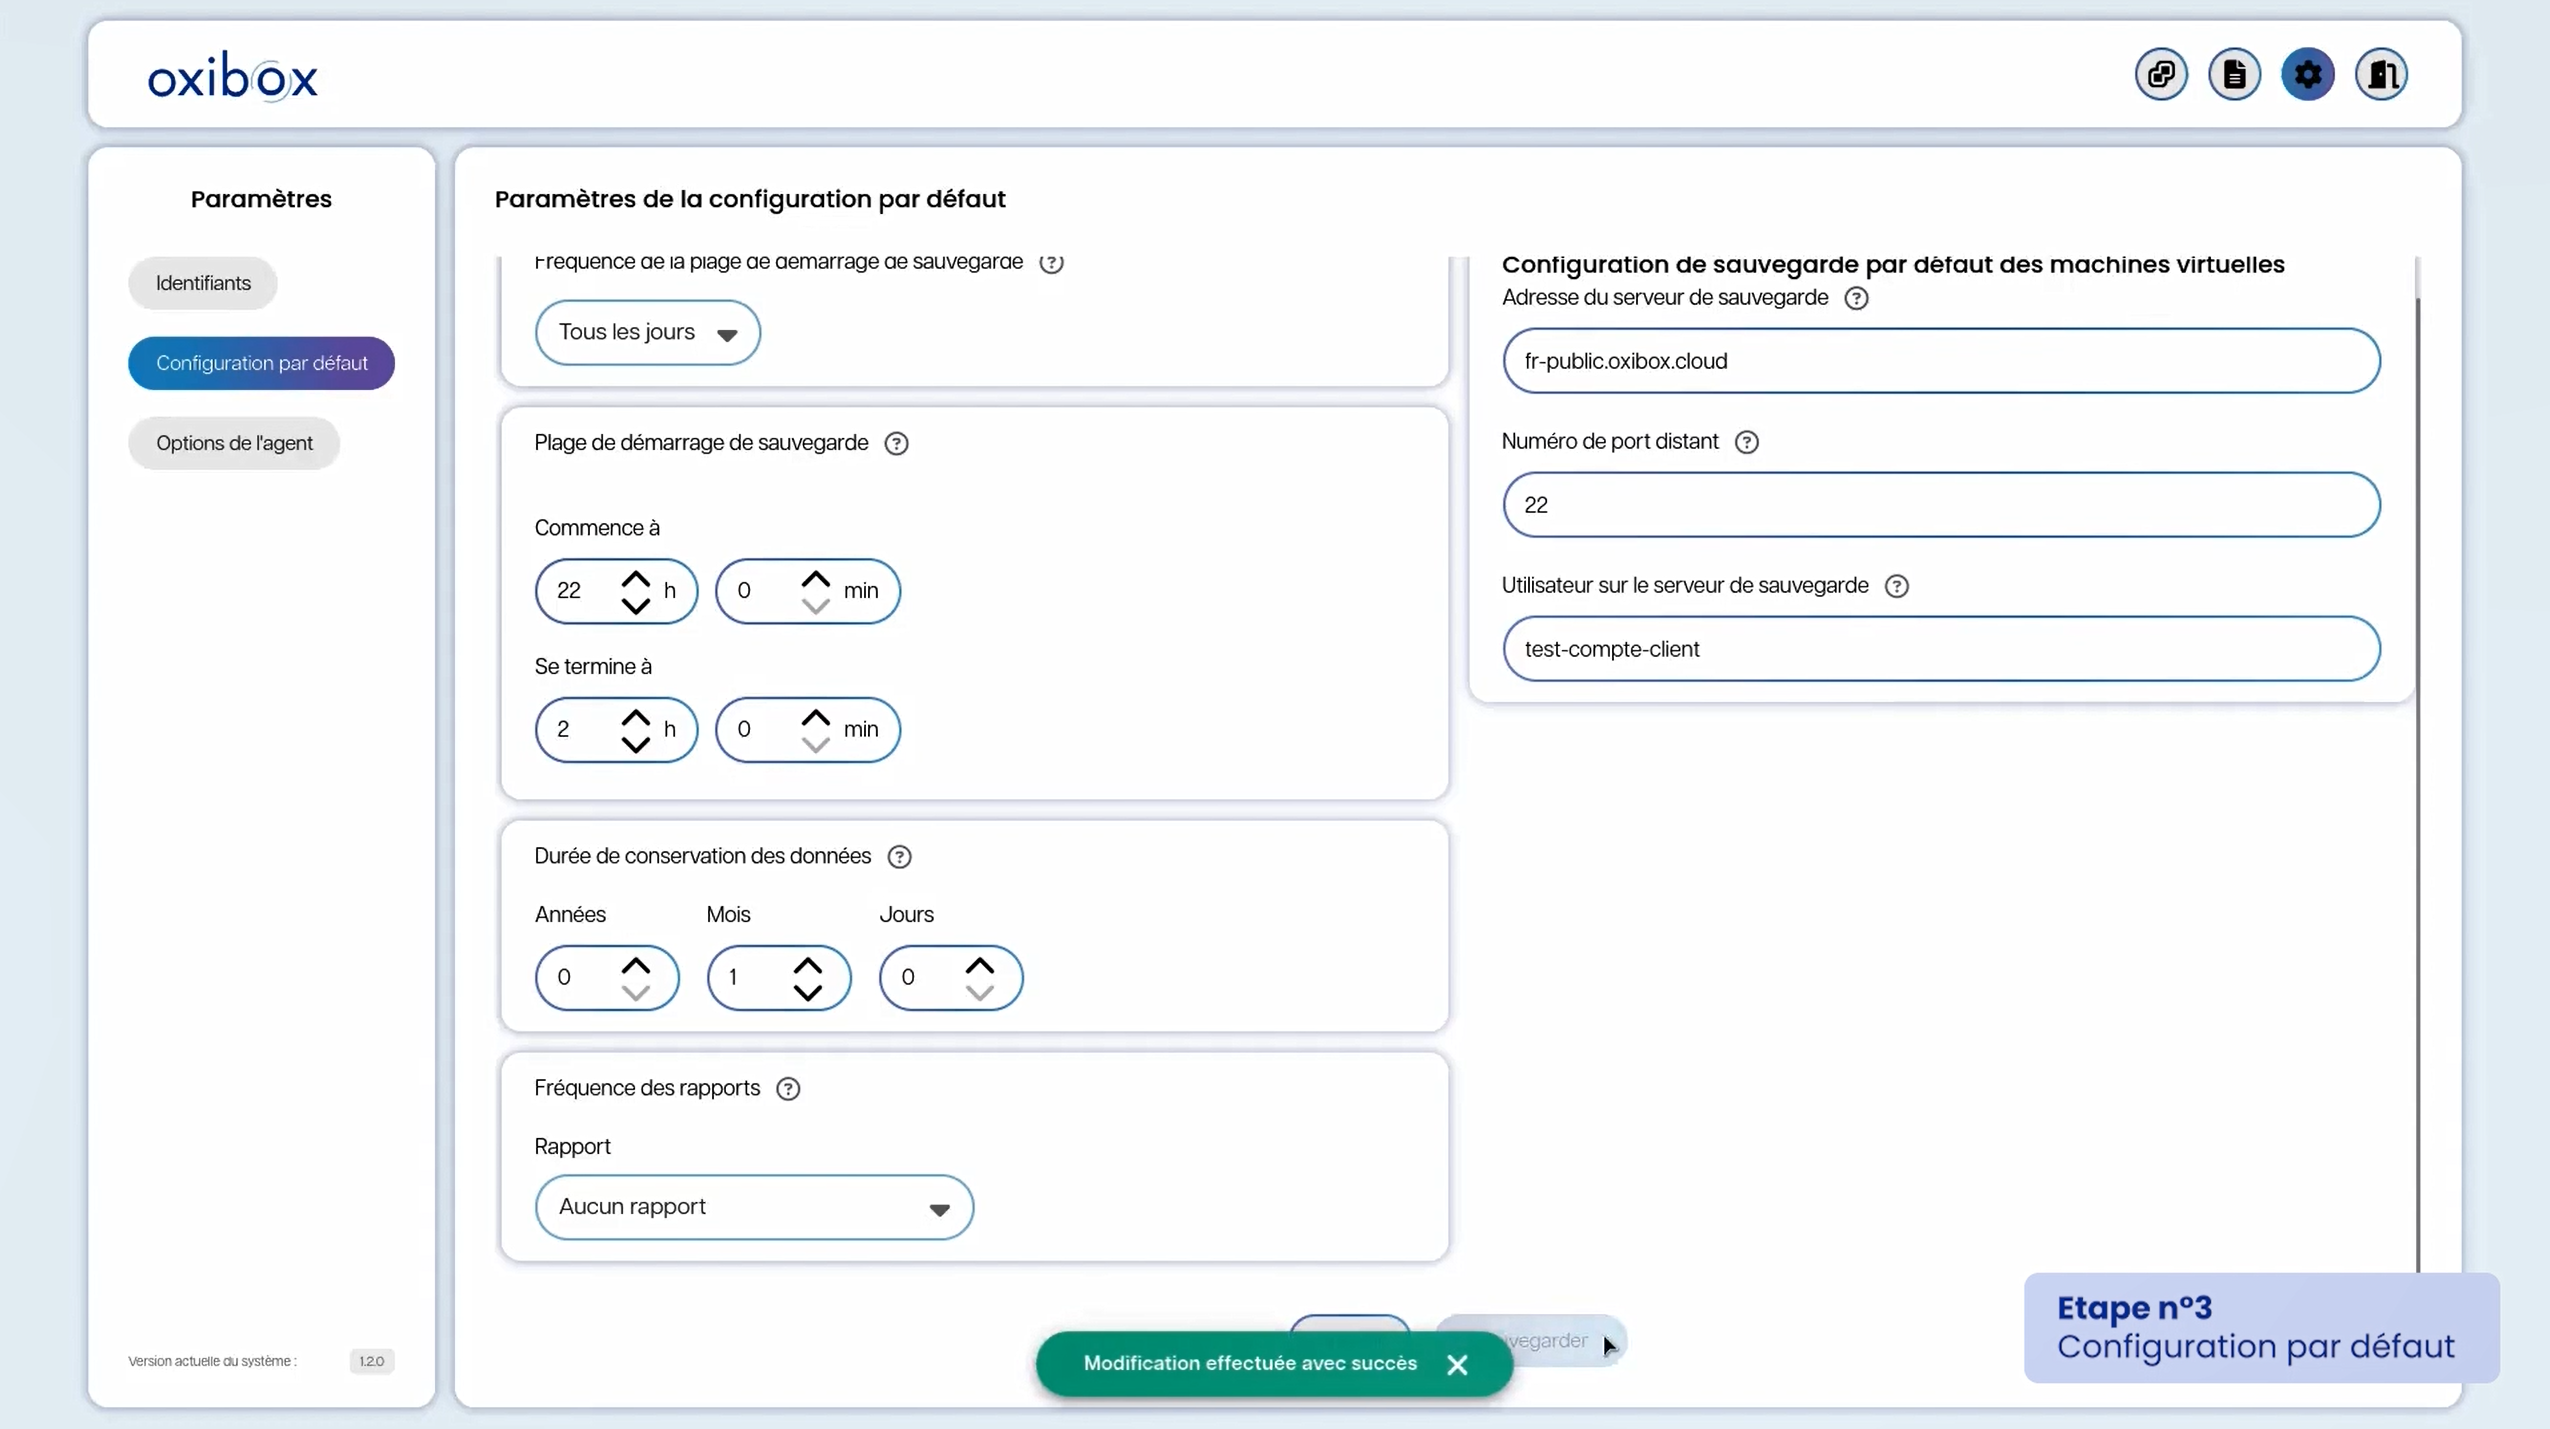
You land on the main page listing the vSphere connections. We recommend first defining the default configuration. This configuration is applied automatically to every VM to back up. Choose the settings to apply, in particular the backup destination. Once a VM has had a first backup attempt, you can choose a different, specific configuration from the Oxibox console.

You can then go back to the main page to add your vSphere. Provide the IP address or host name of the vSphere server and give the credentials of the user dedicated to backup that was created on vSphere in the previous steps. Click Add.
You land on the page for selecting the VMs you want to back up. An option lets you choose whether to automatically back up every new VM detected or only those selected manually. You can move the VMs you do not want to back up to the right-hand column.
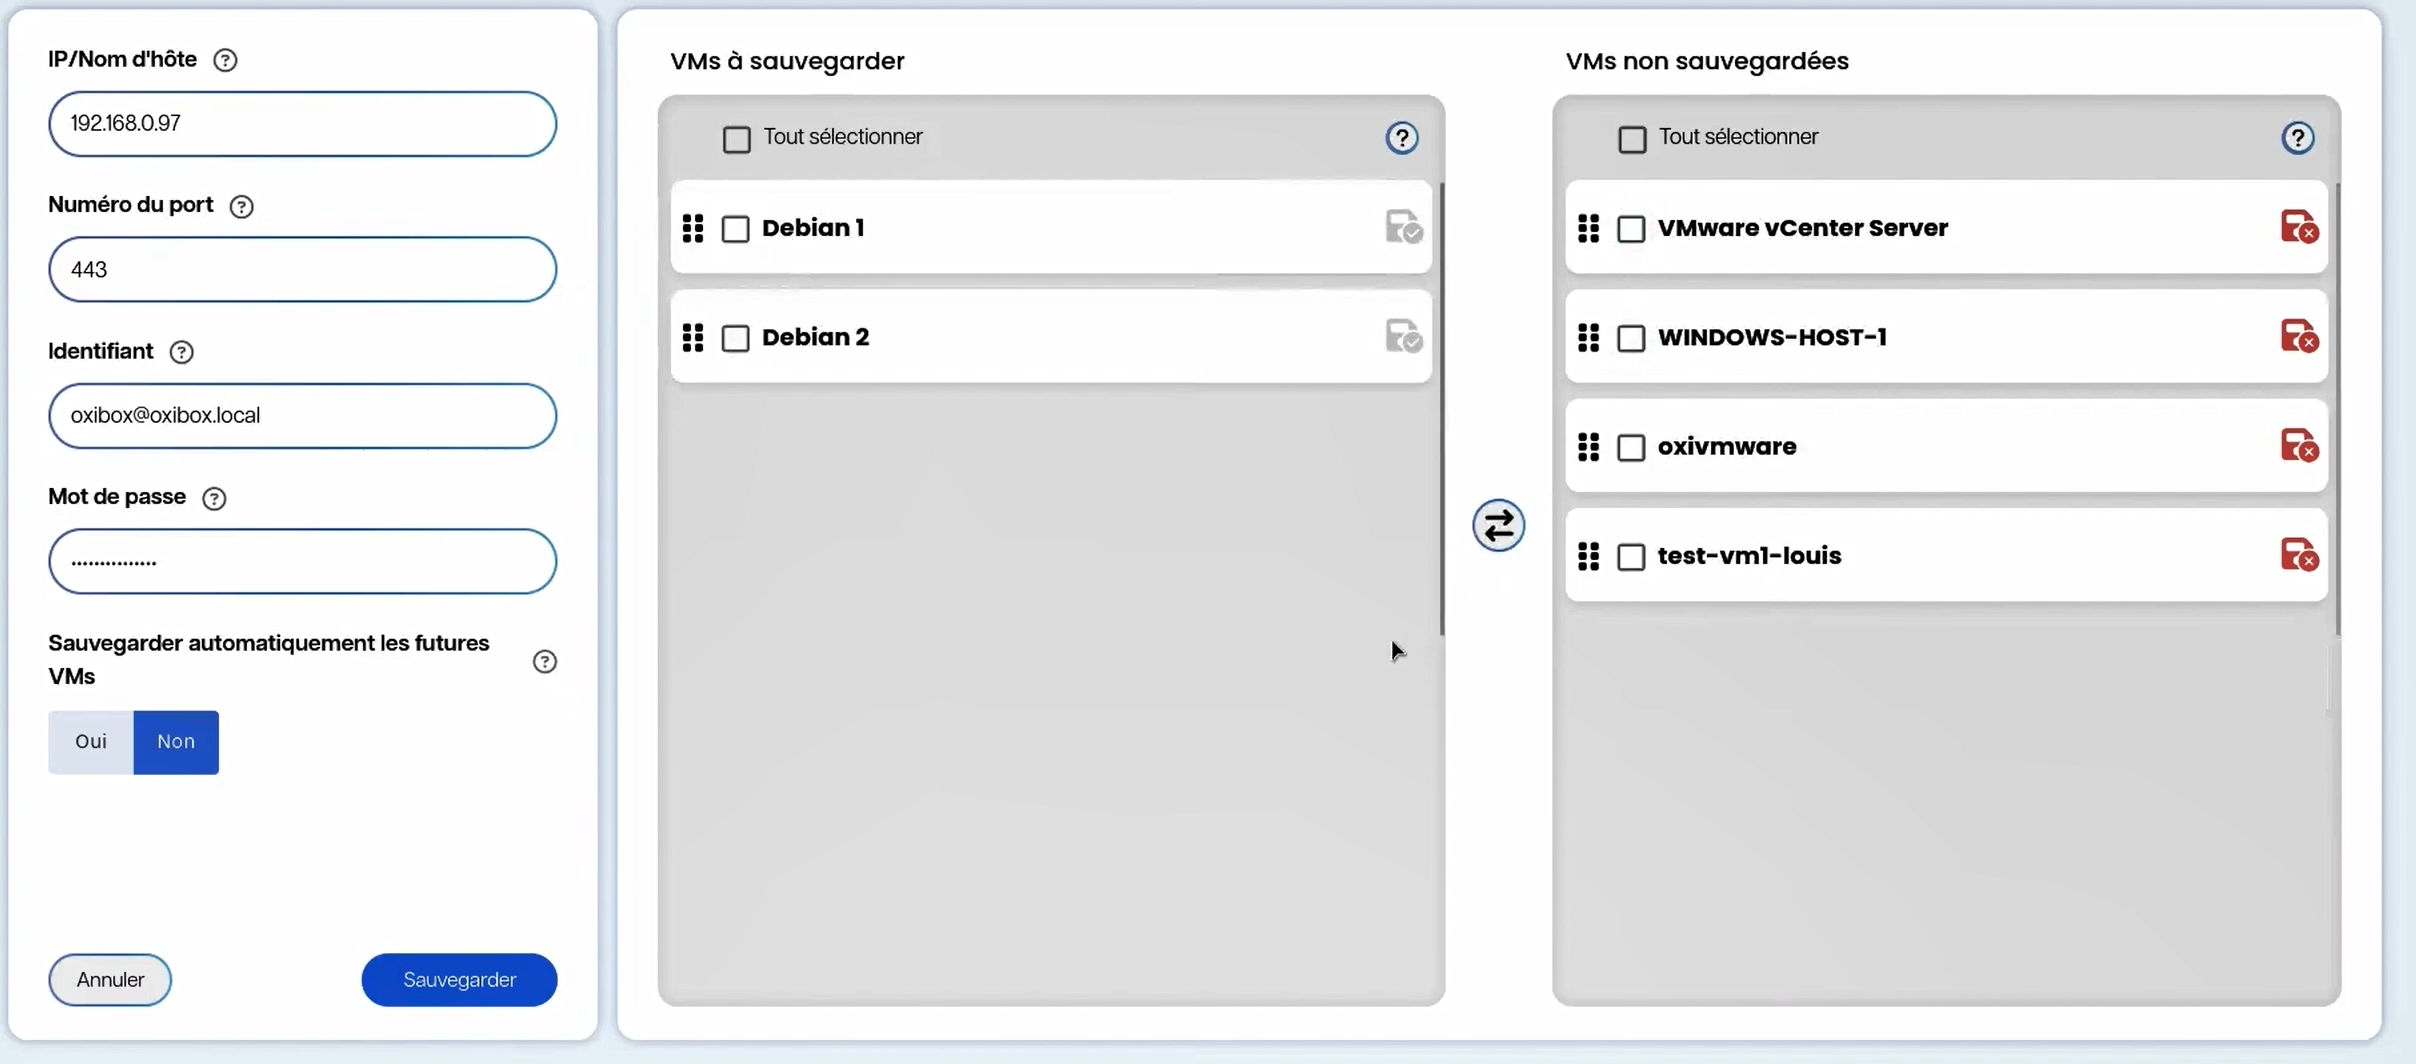
When the selection is finished, you can save the configuration. The backup agent starts the backups as soon as the backup startup range is reached. The VMs appear in the Oxibox console with their VMDK virtual disks and their configuration in OVF format.
Restore procedure
Through the Oxirescue restore console, you can perform either a full restore of the VMs or a granular restore, that is, a selection of files contained in the virtual disks.
For a granular restore, browse the virtual disk (VMDK files) directly in Oxirescue and select the folders and files you need.
For a full restore, download all the files linked to the VMs you want to restore (OVF configuration and VMDK virtual disks). Then use the import function in vSphere to bring the VMs back into your virtual infrastructure.
To do so, log in to the vSphere interface, right-click the datacenter where you want to restore the VM and choose “Déployer un modèle OVF” (Deploy OVF Template).
In the window that opens, select “Fichier local” (Local file), then click “Télécharger des fichiers” (Upload files) to select the OVF file and the VMDK files you downloaded earlier, then click Next.
Follow the rest of the instructions: the VM gets back its original settings by default. At the end of the operation, the VM is imported into your infrastructure and you can start it.