
Install the Oxibox backup agent on a machine that has access to the storage where the Proxmox backups will be kept. Ideally, the agent runs on the same machine as the storage, to make the best use of resources and network flows on your infrastructure.
Prerequisites
To back up a virtual machine, you must first configure a backup through Proxmox. Depending on the datastore used for the backups, the agent can be installed:
- Directly on the machine that hosts the datastore.
- On a machine that has access to the files stored on the machine hosting the datastore (for example through a network mount).
Configuring the Proxmox backup
There are several models for storing the backups made by Proxmox: local storage, Proxmox Backup Server, NFS storage, etc. Use the option that suits your infrastructure. Ideally, the backup agent can be installed directly on the destination machine so it reads the data as efficiently as possible. Connect the storage to your Proxmox server so that it can be used when you configure the backup.
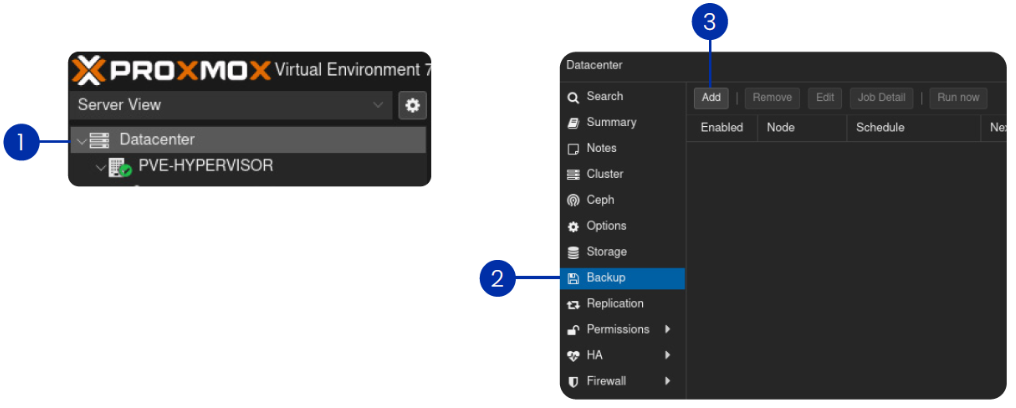
- (1) In the Proxmox interface, select the Datacenter concerned.
- (2) Go to the “Backup” menu and (3) click “Add”.
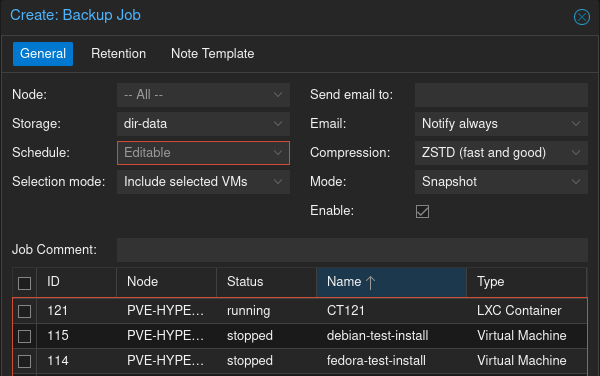
In the window that appears, you can select the backup and retention options. Choose the options according to your needs:
- Storage location of the backups (use one that the Oxibox backup agent can read),
- Backup frequency,
- Compression of the generated files,
- Backup mode: snapshot mode is recommended so that your virtual machines keep running without interruption,
- Select the virtual machines to back up from the list.
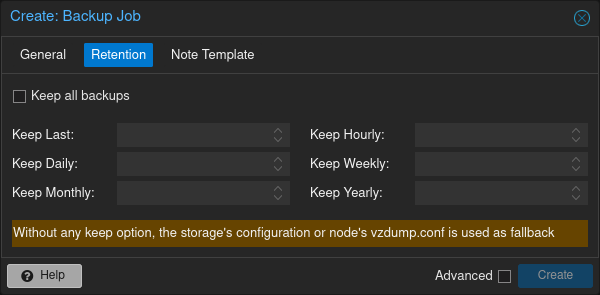
- In the “Retention” tab, choose the number of versions to keep. The Oxibox backup solution already manages the retention of your data, so this setting depends on the frequency and duration of the backup job on Proxmox and Oxibox. Retention on Proxmox must be long enough for the Oxibox agent to back up the files before Proxmox deletes them.
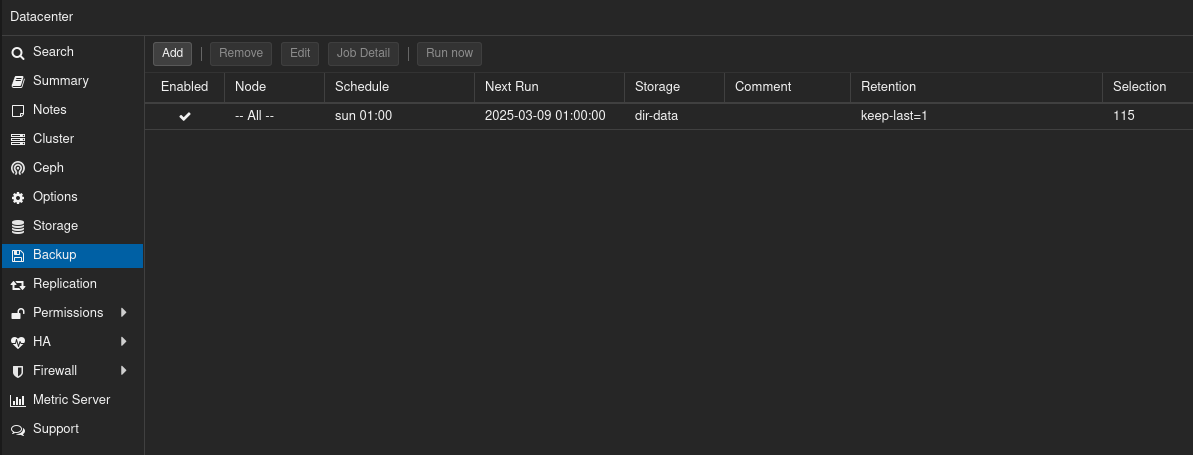
- Click “Create” to create the Proxmox backup job. It appears in the list.
Installation
Install the compatible agent on the machine hosting your datastore, where the Proxmox backups are stored, or otherwise on a machine that has access to these files by other means, such as a network share. Follow the instructions for the operating system concerned to install and activate the backup agent.
Then you can move on to the configuration step suited to that operating system.
Configuration
The paths to back up are simply the paths that contain the backups made by Proxmox. Follow the usual configuration steps to set the backup frequency, destination, retention period, etc.
Restore procedure
Through the Oxirescue restore console, you can perform either a full restore of the VMs or a granular restore (if the backup format allows it), that is, a selection of files contained in the virtual disks.
For a full restore, download all the files linked to the VMs you want to restore. Then use Proxmox's function to import a VM to bring the VMs back into your virtual infrastructure.
For a granular restore, browse the virtual disk directly in Oxirescue and select the folders and files you need.