
Installation
Install the compatible Windows agent on the Hyper-V server and follow the instructions to activate the backup agent. Then you can move on to the configuration step.
Configuration
Configure the backup as described in Configure the Oxibox backup agent. Select the directories that contain the virtual machine files. To back up a VM in full, you need the following 3 paths:
- Path of a VM's virtual disks
- Path of a VM's configuration
- Path of a VM's snapshots
Virtual disks path
The default path is C:\ProgramData\Microsoft\Windows\Virtual Hard Disks or %systemroot%\Microsoft\Windows\Virtual Hard Disks.
To find the location of a production VM's virtual disks, open the VM settings and go to the hard drive section.
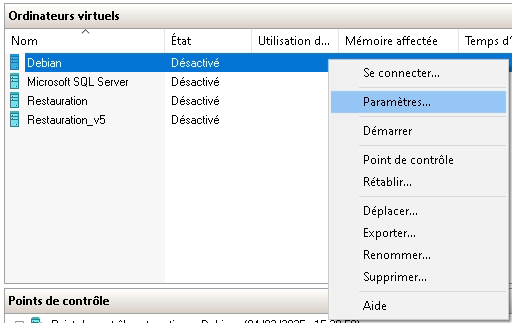
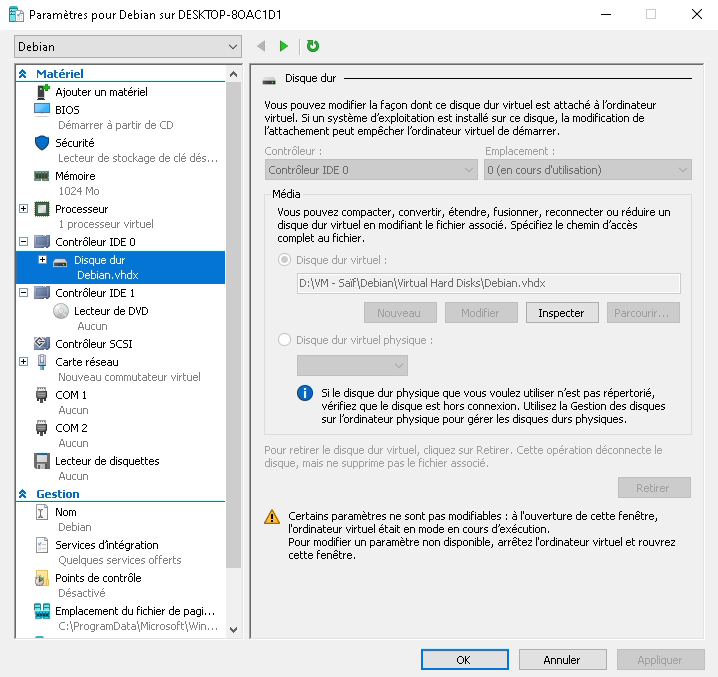
In this example, the path to select for the backup is D:\VM - Saïf\Debian for only the VM named “Debian”, or the whole folder D:\VM- Saïf to get all the disks of the VMs stored at this location.
Configuration path
The default path is C:\ProgramData\Microsoft\Windows\Hyper-V\Virtual Machines or %systemroot%\Microsoft\Windows\Hyper-V\Virtual Machines.
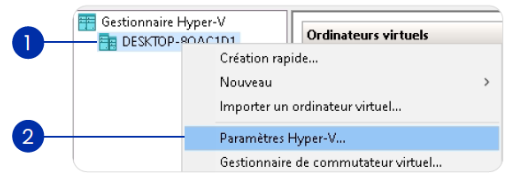
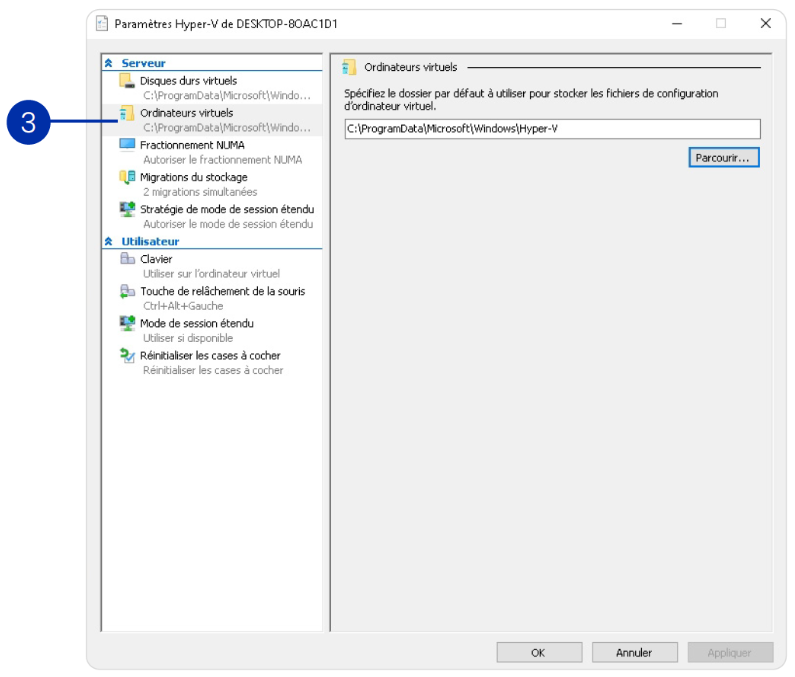
To find the location of a production VM's configuration, open the settings of the Hyper-V node.
- Right-click the Hyper-V node.
- Click “Paramètres Hyper-V” (Hyper-V Settings).
- In the “Ordinateurs virtuels” (Virtual Machines) section, you can find the path that holds the virtual machines' configuration. It is in the “Virtual Machines” folder.
Checkpoints (snapshots) path
The default path is C:\ProgramData\Microsoft\Windows\Hyper-V\Snapshots or %systemroot%\ Microsoft\Windows\Hyper-V\Snapshots.
To find the location of a production VM's snapshots, open the VM settings.
- Right-click the VM.
- Click “Paramètres…” (Settings…).
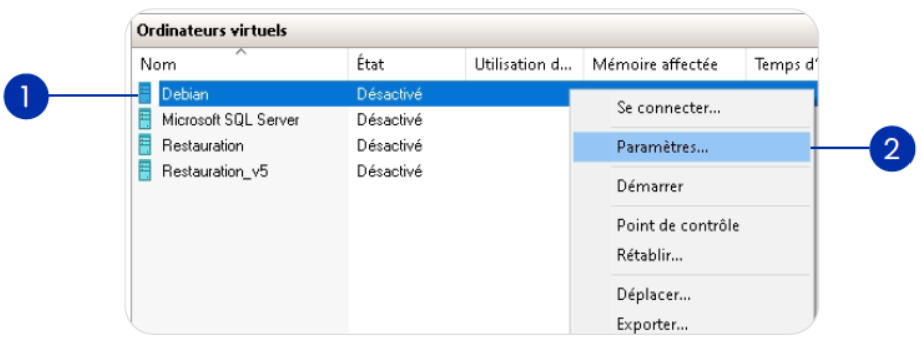
- Go to the “Points de contrôle” (Checkpoints) section and look at the “Emplacement du fichier de point de contrôle” (Checkpoint file location) field. The checkpoints are then stored in a Snapshots subfolder of that folder. In this example, the path to select for the backup is
C:\ProgramData\Microsoft\Windows\Hyper-V\Snapshots.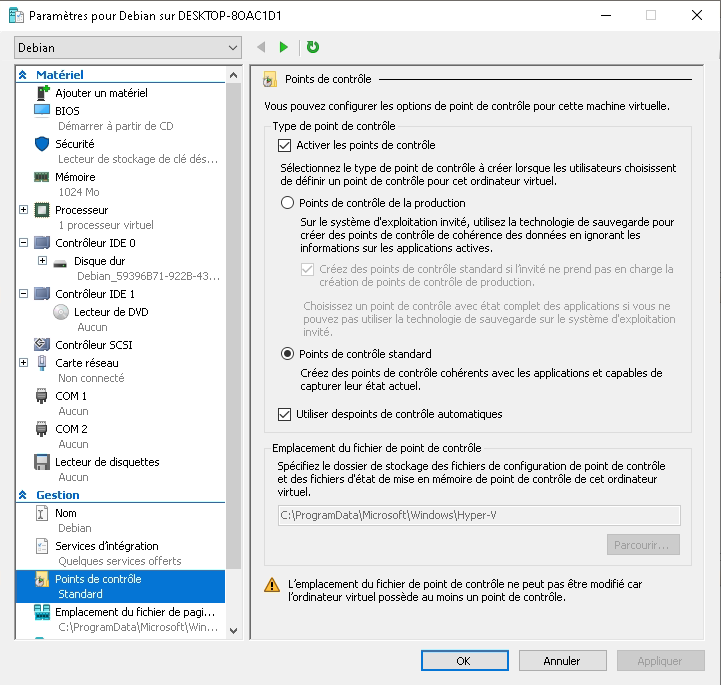
Snapshots can also be stored in the same location as the virtual disks, with the .avhxd extension. If the parent folder was selected when you set up the backup of the virtual disks, they are also included in the backup.
Restore procedure
Through the Oxirescue restore console, you can perform either a full restore of the VMs or a granular restore, that is, a selection of files contained in the virtual disks.
For a full restore, download all the files linked to the VMs you want to restore (configuration, virtual disks and checkpoints). Then use Hyper-V's function to import an existing VM from disk to bring the VMs back into your virtual infrastructure.
For a granular restore, browse the virtual disk directly in Oxirescue and select the folders and files you need.