
Download the executable from the Oxibox console, “New Installation” button.
Installation
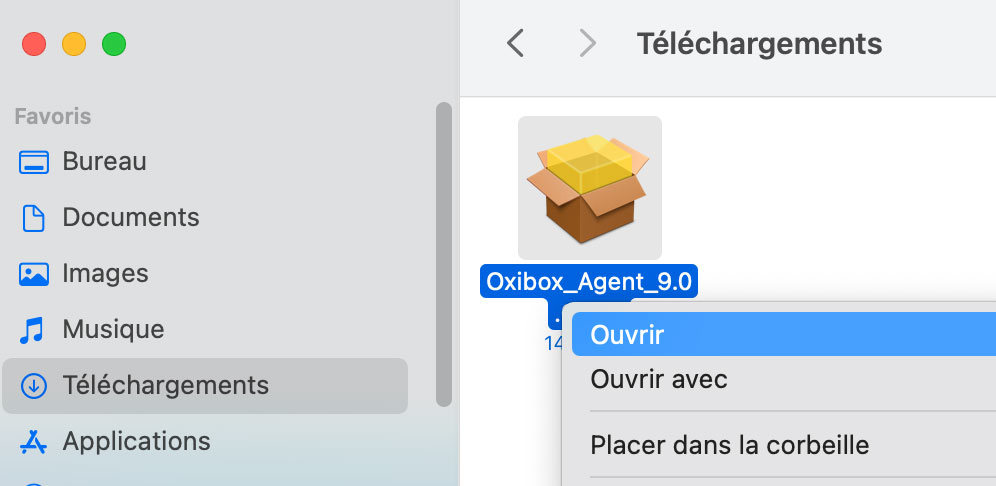
Once the macOS agent is downloaded, right-click it and select “Ouvrir” (Open). You must open it this way to be able to go to the next step.
A window appears saying that Apple cannot verify the executable.
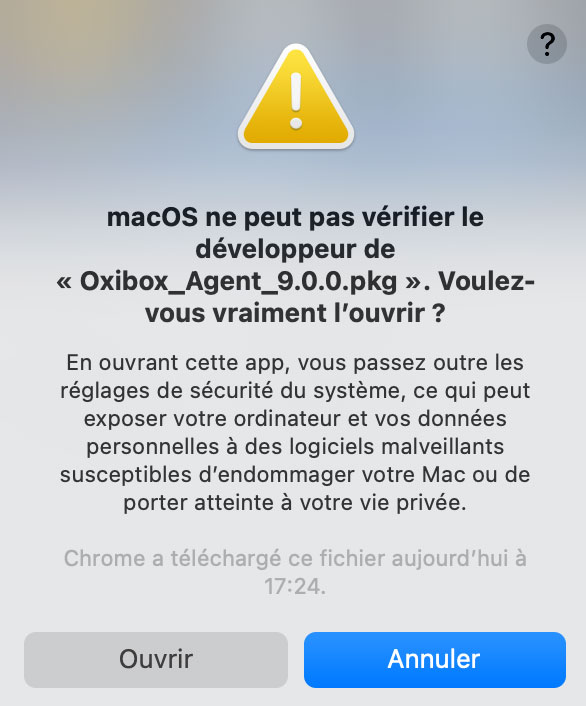
Continue by clicking “Ouvrir” (Open). You now have access to the installer and can follow the instructions.
By default, macOS blocks unauthorised applications from accessing user folders such as “Documents”. You therefore need to allow access to the files that the Oxibox software needs.
To do so, open “Préférences Système” (System Preferences) and select “Sécurité et confidentialité” (Security & Privacy). In the “Confidentialité” (Privacy) tab, select “Accès complet au disque” (Full Disk Access).
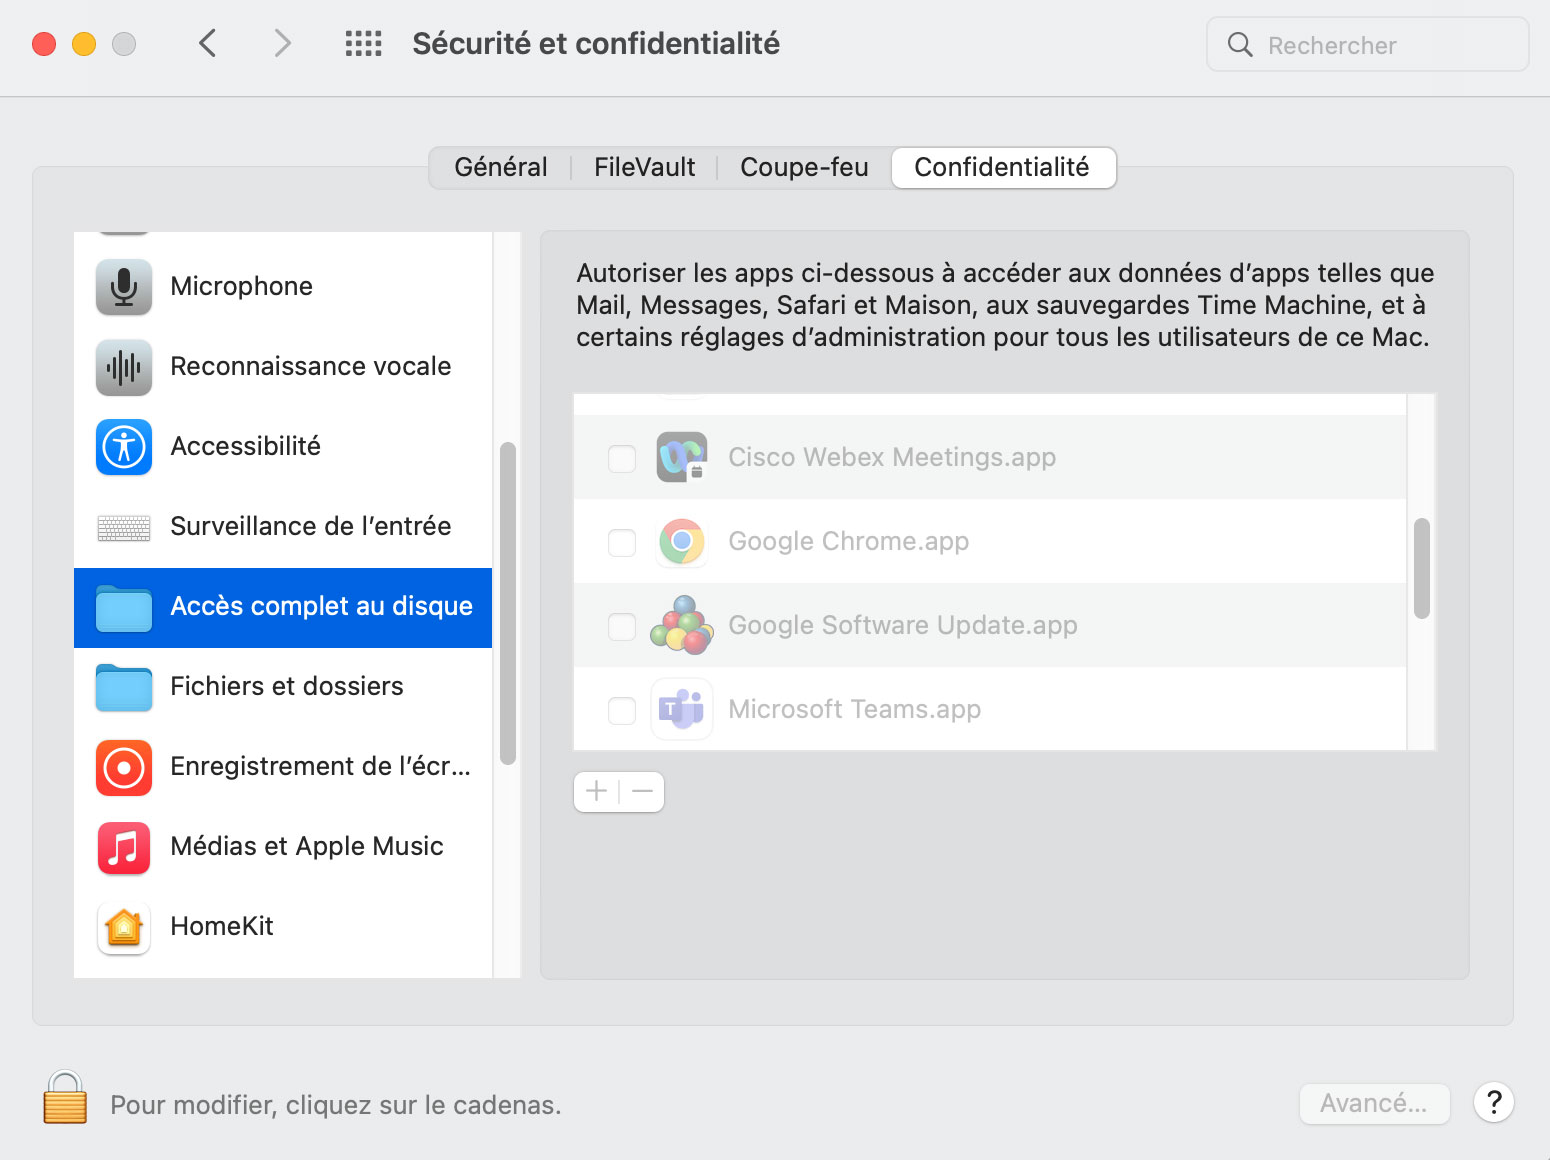
Click the padlock at the bottom left of the window so you can change the settings. Under the box, click “+”.
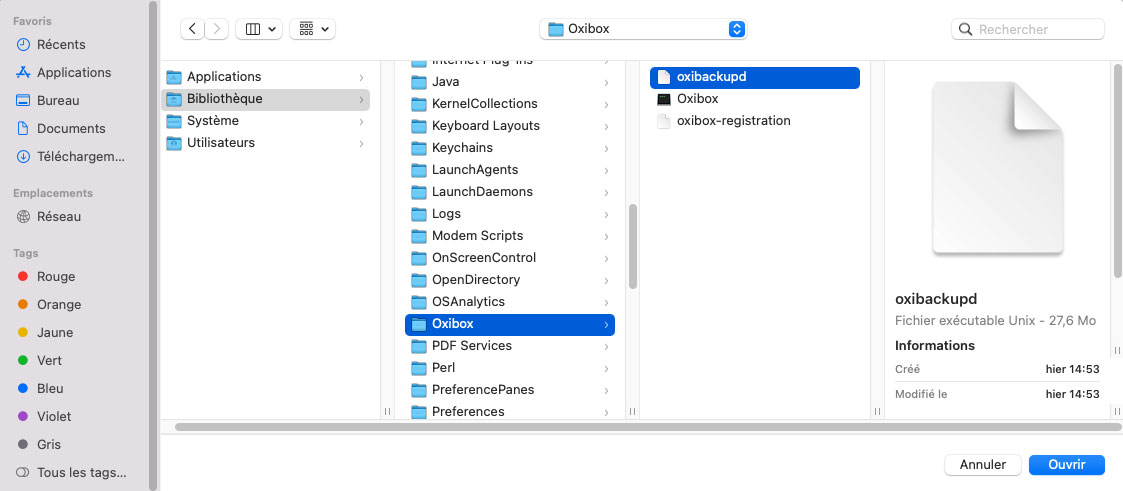
The file browser opens. Press ⌘ + Shift + G (Command + Shift + G). In the text field that appears, type “/Library/Oxibox” and confirm.
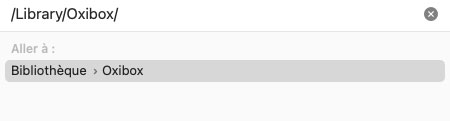
In the list shown, select oxibackupd and click Open.
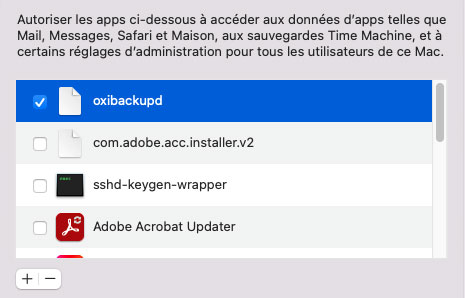
The Oxibox backup agent is now allowed to access the disk. If you untick the line, the permission is disabled.
Update
After downloading the latest version of the installer, simply follow the installation steps, with no prior action.